How Robin Shute’s Team 3D Printed a Full Race Car Body for Pikes Peak

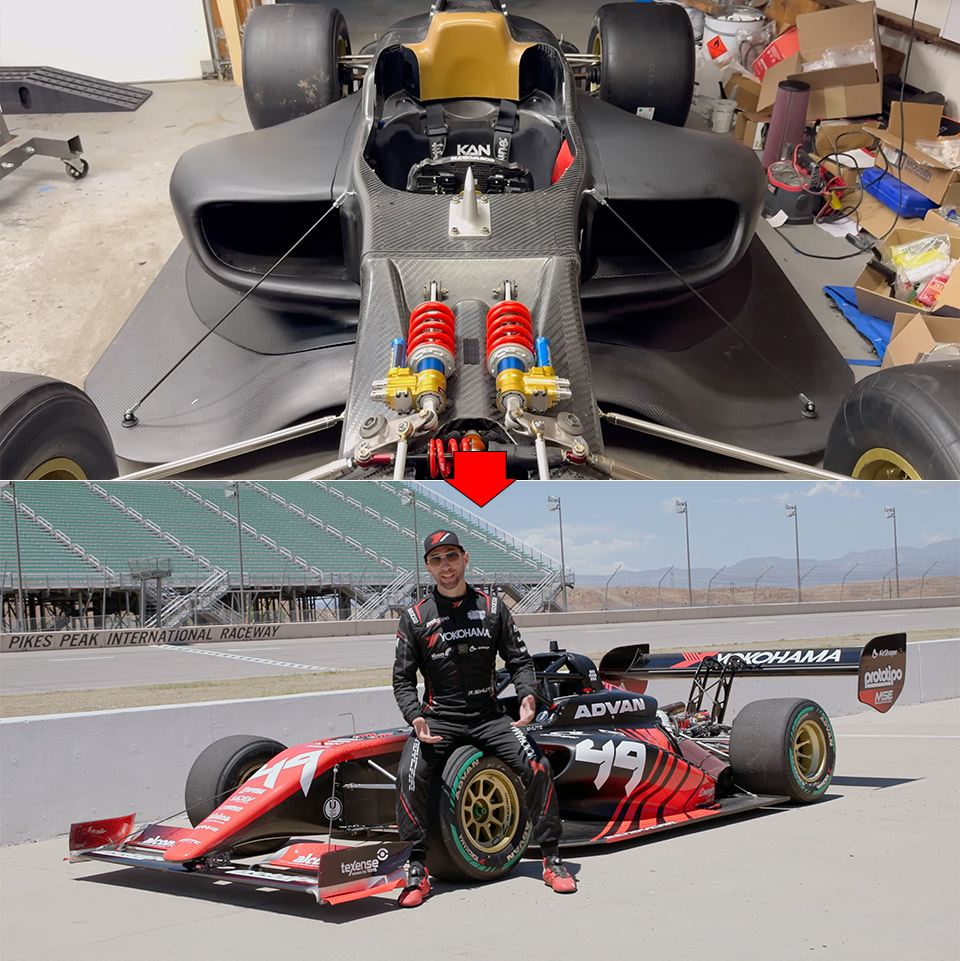
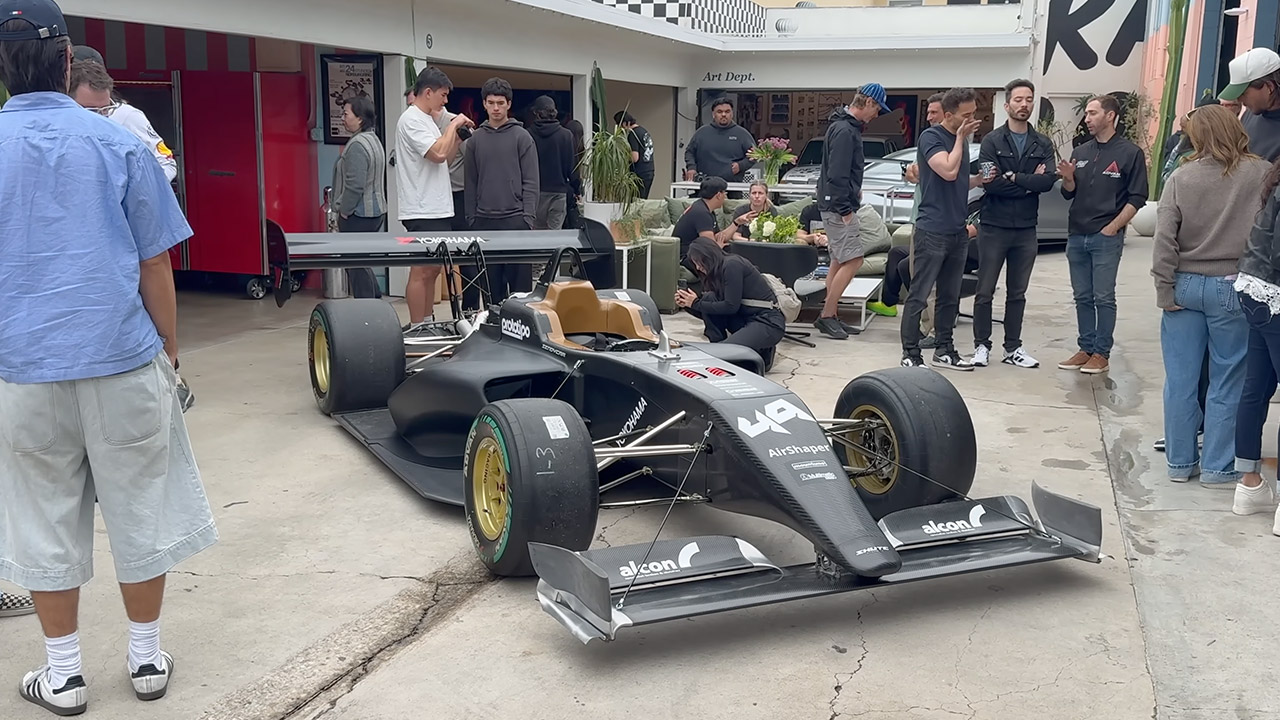
Robin Shute already owns four Pikes Peak International Hill Climb wins. His latest machine, the SendyCar, started life as a ground-up project meant to push even harder. A central tub from a Formula 4 car forms the safety cell. A motorcycle-derived V8 with turbos sits behind the driver and should deliver around 850 horsepower while the whole car stays near 1,300 pounds. The layout mixes exposed front wheels with more enclosed rear sections, a deliberate choice for the unique demands of the mountain course.
Professional shops had offered the crew a rough estimate of roughly $200,000 for a standard composite body…and, honestly, they didn’t have quite that much time to devote to it. So, when two large-format Bambu printers arrived, the solution was already in place: break the entire upper body into 34 individual pieces. They chose high-temperature nylon because it contains carbon fiber, making it heat resistant, which is exactly what we needed near the turbo piping and exhaust, without sacrificing toughness, as it can withstand the rare rock strike. What he really needed was a design that could be broken down into manageable bits and fit into a 12 inch build area. That is why the side pods, engine cover sections, and nose were separated into tiny enough pieces to print without the need for large support systems.
Sale

Bambu Lab A1 mini 3D Printer + LED Lamp Kit, Set Up in 20 Mins, High Speed & Precision, Full-Auto…
- A1 mini + LED Lamp Kit for Creative Light Projects: Bring your ideas to life with the included LED Lamp Kit. Simply print compatible lamp models and…
- The Perfect 3D Printer for Beginners: A1 mini 3D Printer is designed to make 3D printing easy from day one with automatic calibration, simple setup…
- Experience the Bambu Lab Ecosystem: Access MakerWorld’s huge library of ready-to-print models, manage prints through the Bambu Handy app, and enjoy…
The printers were put through their paces, with two machines working nonstop for two weeks. Print time per panel was roughly 12 hours, and they used 10 full rolls of filament, totaling nearly 2 miles of material. The prints were going well, with one or two outliers. The trouble was that the tall, slender portions warped as they cooled, a classic problem. To address this, they went to a true engineering build plate, slapped on some glue for a good first layer grip, and inserted some tiny blocks at the base of those vulnerable sections. The success rate was relatively high, with most parts completed on the first or second try. They had plenty of spares on standby in case anything went wrong.
Once the plastic had cooled, they could try to put the pieces onto the real chassis, which isn’t as simple as slapping them together like a giant 3D jigsaw puzzle. First, they had to align all of the dowel pins correctly. Once they were satisfied with the fit, the team used structural adhesive to secure them all together. Now, nylon is infamous for being difficult to glue, so they had to make sure we sanded the parts down perfectly and used the proper adhesive. That wasn’t the only problem; printing always causes some shrinkage, which created a few headaches, as some of the pins needed some tweaking to get them to sit straight, and one of the portions was left out entirely, necessitating a hasty reprint on the spot. Then there were some holes that required a little glue to cover.
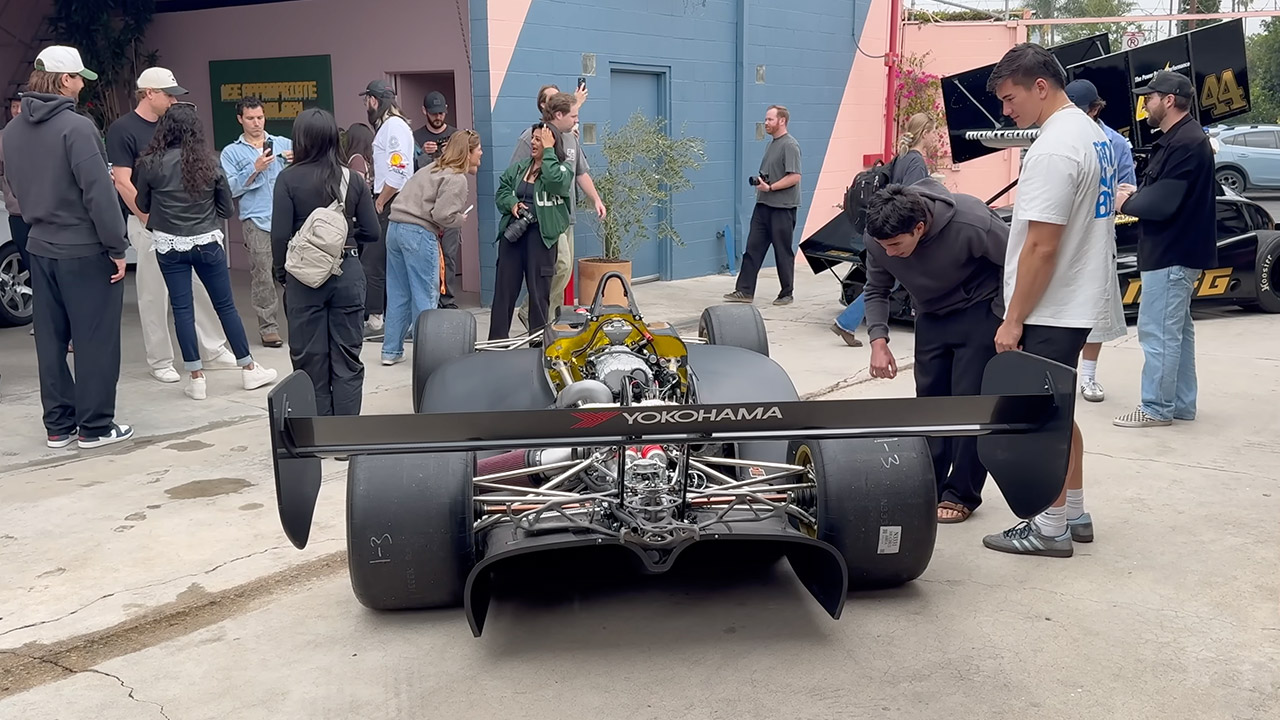
The printed plastic would never leave the garage on its own, that was for sure. So the group went ahead and improved the design with some good old-fashioned carbon fiber wrapping. Before immersing the item in epoxy, they applied a layer of dry fabric to both the inside and the outside. There is no need for pricey vacuforming or tooling; all you need is some elbow grease and common sense.A layer of peel-ply fabric helped to remove the extra resin, leaving them with a lovely usable surface; but, the end result was a reinforced 3D print rather than a properly moulded composite. After applying fairing compound and sanding, she looked fairly decent. The team was under pressure to finish her before the first public presentation, so they applied a final vinyl wrap to add color and graphics.
How Robin Shute’s Team 3D Printed a Full Race Car Body for Pikes Peak
#Robin #Shutes #Team #Printed #Full #Race #Car #Body #Pikes #Peak